Tuesday, May 31, 2016

About This Blog


Greetings!

Thanks for visiting our Design Thinking / Design Lab Blog. Maybe you are part of our Parker community, and you're curious about where the School is going with Design Thinking. Maybe you are contemplating the integration of design thinking processes into your school. Maybe you are in the midst of implementing design thinking at your school. Maybe you have the funds and space for a design lab, and you're wondering where to start. Maybe you are just curious about design thinking and you'd like to consider how to plug it into your teaching and learning processes someway, somehow. Whatever the case might be, welcome!

This blog is intended to be a literal and figurative "open book" about our ups and downs and ins and outs as we integrate design thinking and the creation of Parker Design Labs into the comprehensive preschool through 12th grade academic continuum. We hope that by being open and transparent about what we're doing, we will keep our community interested and involved in our work. Furthermore, we hope to inspire and help others with their work in design thinking at their schools. Finally, we also hope that by having an open place to share, we might be able to apply design thinking principles into this process as comments and interactions may yield some fantastic suggestions and ideas. If you have a question, please ask! If you have a comment or suggestion, please share!  

The Francis Parker School is an independent co-ed day school located in beautiful San Diego, California. To learn more about our School, its history, and its culture, please visit our School's website: www.francisparker.org.

Thanks for joining us on our design thinking journey. We hope that this will help you learn from us, and we hope to learn from you!

Tuesday, May 17, 2016

5th Grade Innovation Fair...students solving real world problems.

5th Grade Innovation Fair

The goal was to take our traditional science fair for 5th grade and transition it into a true design thinking project. Last year, we had taken a big step forward by removing the "work at home" component of our science fair and keeping the learning and project work in the classroom so that we would have authentic student work. We also integrated a reflective component for students to discuss what did and did not work. These were great additions, but we felt it was time to really embrace design thinking completely. We wanted to take all of the steps of design thinking that we'd been learning about all year and really dig into the empathy element. 
We also wanted to focus on how design impacts others in our community. How might we make our environment better by solving real world challenges at our school? Here's how we do this in our own back yard - moving forward students should be ready to have "real world" clients for their design solutions. We wanted them to see something that needed change and know that they can effect change. This was a big part of the project! 

Students interview classes to determine needs
So, this year, we created a design challenge for our fifth graders. We had students go into all of the classrooms across our Lower School campus find out needs in the various rooms. The students interviewed students and teachers. Following those interviews, students returned with proposals for a solution to the problems uncovered in the interview (empathy) process. 

We pre loaded our process with all teachers in all classrooms so that they would be brutally honest with our fifth grade designers. This honest feedback and need for adjustments to meet needs led to better products. This was so good for our students...we had worked with the students on this over the year, but having an actual consumer was a new twist in the process for these kids. As a result, our designers went through the design thinking process several times... focusing on the need to revisit steps on the design thinking wheel. They were constantly trying to better meet needs based on feedback they were getting from teachers and students.

Reviewing stated needs and designing a solution
Designing a solution for others

Designing solutions 
The students were responsible for documenting the process. We assessed the project via their documentation and how they included that in the showcase the process itself via their presentation boards. The assessment was less about the product itself, and more about how they captured their process through photos and writing. We kept asking students to capture what they actually did during each step of the design thinking process. This was a big plus in terms of helping us see their thinking and their work throughout the process. We prompted students to photograph and write up their thinking nearly daily. 

Students document their process 
Documentation of process


At the conclusion of the design and creation phases, the fifth graders actually crafted finished products for each classroom that are now actively in use by students and teachers. They presented their finished products and process during the 5th grade design showcase in mid-May and they received rave reviews from parents and faculty for their perseverance and clever solutions. 

Proud students show off their final product!

Dr. Gillingham, Lower School Head, learns about a design solution.

Parents were invited to our design showcase to hear about the designs.
Reflections about this project: 
1. We had some projects like this but the students had to put themselves in the feet of others, but never had them actually working with a client directly. This was a great capstone experience for students to put the actual "customer" at the forefront. This will prepare our students to move into Middle and Upper School, where they will likely present their research, ideas, and findings to "real world" audiences outside of our school house. 
2. We have seen iteration grow as a word in the vocabulary of 5th graders this year, and it is regularly used now. Parents are telling us that kids make comments about "iterations" when talking about problem solving, and they have shared that students are using the design thinking process to break down problems at home! 
3. Time management, collaboration... all of those 21st century skills or habits of mind were really critical in this project along with their physical carpentry. Carpentry was not the intended focus but it ended up being an essential part of the project in the end. This points back to the need for spiraling instruction and planning backwards - ensuring we skill up our students on basics so that they can successfully complete the final product. This takes time and solid planning. We'll have to work on getting better on this next time around.
4. Compared to prior years, teachers got more involved in this project, and even better, all teachers learned how important iterating is to the process of design thinking and learning in general. We feel that this project really "moved the needle" in terms of celebrating going back and improving and cultivating the "fail forward" mindset rather than striving for perfection on the first time around.

Ensuring students are "skilled up" = successful project


Students hard at work on their solutions


Tuesday, May 10, 2016

4th Grade Map project

This year the fourth grade teachers and the Design Team worked together to come up with a social studies project that would allow students to do more than simply memorize and recite the information they've learned about our home state of California.

We wanted them to apply their knowledge and skills in an authentic and engaging way.  In other words, we wanted them to actually do something with what they've learned!  The project below, which ultimately turned out to be an interactive large-scale map of California, provides strong evidence of what our students were able to do with the information they learned and the skills they acquired across many disciplines. Skills like reading, writing, and research; content knowledge from social studies, science, technology, art, and design lab; and practice using essential habits of mind such as collaboration, communication, and creative problem solving...this project had it all!

This was essentially a year-long project - in the way that many year-long projects in schools go, it happened in fits and starts along side and in between other critical components of learning throughout the academic year. We would tackle a portion of the project as content learning occurred, and then put it aside for other work, returning to it when the content called for more work on the map. The map was tied into various parts of social studies curriculum. So, as an example, when students were studying missions, they would plug in missions on their map. This was done by determining how best to represent the missions as a "genre" on the map, and then ensuring missions were properly placed, identified, and labeled.

In essence, these maps measured approximately 6 feet tall and 3 feet wide, and they included:
Geographical features - 3d relief features and LED lights for san andreas fault
Missions - carpentry with qr codes with facts
Cities - dowel and flag - accuracy in location latitude/longitude
Points of interest - qr codes
Landmarks - highest, lowest point
Geographic regions - color and paint, textured, sand for deserts
Rocks/minerals - located them and used actual samples with qr codes with information
Explorer routes - denoted with flags and qr codes and marked the route with drawn on lines
State animals, state birds, and other student interest elements (surf spots)
Weaving in art - this was NOT on the map, but we integrated this as a tangental project that tied in gold rush studies with articulated art objectives for fourth grade, and it tied together learning components that we could not capture with the map project itself.

If a student team polished off a part of the map early, teachers prompted them to continue enhancing their maps with personal interest items. As always, at the close of the project, students were prompted to spend solid time reflecting on the product and thinking about the process they just went through. Kids reflect that they didn't have to like everyone but they did need to work well with them. They also shared that they under-estimated their groups. Students were harder on themselves than we would have been, which is ultimately great as it leads them to be critical of their work in the best of ways.

Reflection:
We would've loved to have had a bit more time - it would have made the maps really and truly incredible. As a teaching team, this was our first iteration on this project. While we liked the end result, we have reflected on how to do it differently next time and have several ideas on how to better incorporate the steps and create a more robust final product. Something we would love to do is create an outside audience for them to present their final products to in some way. If we find a good outside audience we could really focus the work for that and provide motivation to the kids as well. Could also be interesting to look at a partner school to work with on a project like this.

Below are several photos of the process:

Identifying the elements that need to be captured on the map
Starting the process of creating the map - it was going to be BIG


Student groups begin putting in geographical features
We stressed accuracy as being absolutely vital to a successful product

Students begin marking explorer routes and other items on their maps


The map for this group is about 2/3s finished at this point
Research - always more research before putting anything permanent on their maps!

Students collaborate to ensure accuracy on placement of items


Landforms begin taking shape
Another group's landforms


And again, back to researching to ensure their maps are perfect
Laying down explorer routes and major cities
Using plaster to represent landforms 3-D style

A nearly finished product - hours of work, lots of pride!


Monday, May 2, 2016

Exploring Science Through the Arts...in Third Grade!

3rd Grade Environmental Studies Project: 
Threatened Bird Habitats in Southern California

This project came about in a very organic way, and as a result of that, it really held significance and meaning for our students... which led to buy-in across several disciplines. 

A visit to the estuary ultimately led to the biggest project of the year in third grade.
What happened:  a science project took off. Each year students visit the estuary as part of their regional studies. The students this year really honed in on the birds at the estuary and felt deep concern about the plight of native birds due to loss of habitat. Their concern (empathy) ignited a spark for the design team and this allowed us to really pick up on several elements of the students' concern - and we made the call to let students run with their passion and interest on this topic. It was clear to us that our students developed strong empathy for the plight of birds in our region and they wanted to do something about it. 

And so, we dug in! First, classroom teachers and science teachers gave time for students to do a deep dive and research birds in library. Students assembled facts and figures, and as part of their learning they crafted a narrative about the bird which they were studying. 
Research underway about various birds indigenous to our local area

After this, students used their art time to draw and paint their birds, with an emphasis on anatomical correctness and proportional representation. 

Students carefully draw their birds
In social studies and science, the students created a relief map highlighting watersheds for birds in San Diego county using a variety of resources and methods to demarcate zones and areas. 
Working on their maps
Students then investigated behavioral adaptations of birds to changing ecosystems by acting out bird movements for food, shelter, and socialization in drama and then we captured their "performances" using green screens to demonstrate how birds get food and sleep and move (using a realistic background selected by the students themselves).

Using a green screen to act out and demonstrate adapted bird behaviors
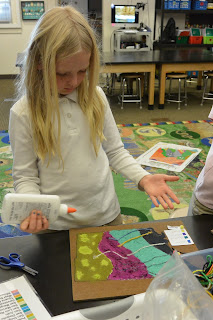
Physical adaptations of various birds were studied and explored in science, and then polished off in the design labs. Students built the beaks and other important element physical adaptations in the birds to demonstrate how those adaptations allowed birds to survive. 
Creating replicas of the physical adaptations for bird beaks 
At the close of all of the research, hands-on learning, writing, and drawing, we held our first design showcase. This showcase let students show off all of their work in the various parts of their classes. Students were actively engaged in teaching their parents about the different kinds of birds, beak types, behaviors, and problems with the local environment. This was the first "showcase" approach to students showing off their learning to parents or outside community, and it helped us set the tone and expectations for "design showcases" moving forward. This is going to be our model for demonstrating learning, with the hope of moving to bigger audiences outside of the school house later. 
Turnout for our inaugural showcase was outstanding!

One of our goals for this year was to create design projects in a way that we are addressing the required and appropriate guaranteed curriculum for each grade level. This is a great example. We hit curricular standards in art, science, social studies, literacy, and even math. The students absolutely loved this project and they were clearly incredibly proud of their work at the end. 

Students explain their research and project elements to parents

Students teaching parents about endangered birds in our area